Gingerbread architecture

It’s been 6 years since the last published post on this blog. Many things have happened since, among them the spin off of another website for my photography, which sees marginally more activity than this one. I’ve also refocused my interests, spending a lot of my free time researching the architectural history of libraries, which have become the near unique subjects of my images.

In late 2021, this obsession of mine with library architecture led me to participate in the Toronto Society of Architect’s yearly Gingerbread City baking competition, submitting a model of the Monique-Corriveau library in Québec City. This was a lot of work, but also a lot of fun. My main inspiration was the previous year entry by now TSA Executive Director Joël León Danis, whose yearly gingerbread creations are of a different level entirely.

Gingerbread and candy glass architectural model of a modernist church. The model is lit from the inside.
“Bibliothèque Monique-Gingembre”, my entry to the 2021 TSA Gingerbread City challenge, a model of Bibliothèque Monique-Corriveau in Québec City.

In 2022, my entry to the same competition was a model of the Beinecke Rare Book and Manuscript Library at Yale University.
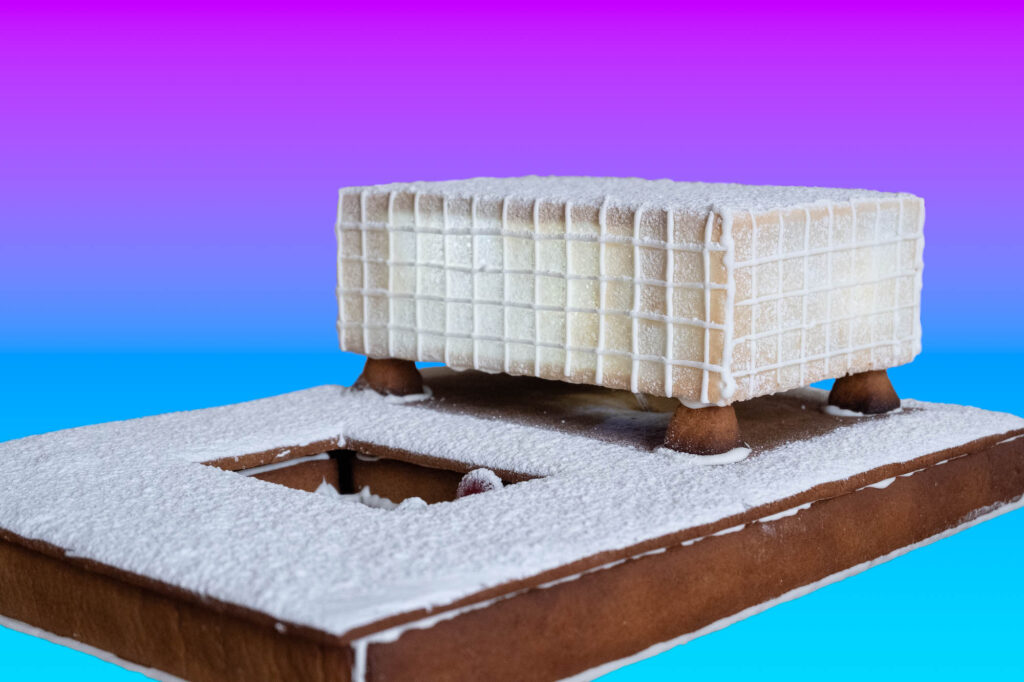
Gingerbread architectural model of a modernist library.
“Beinecake Library”, my entry to the 2022 TSA Gingerbread City challenge, a model of the Beinecke Rare Book and Manuscript Library at Yale.

In 2023, I baked a gingerbread and isomalt version of the Halifax Central Library that I had visited earlier that year for my photography project.
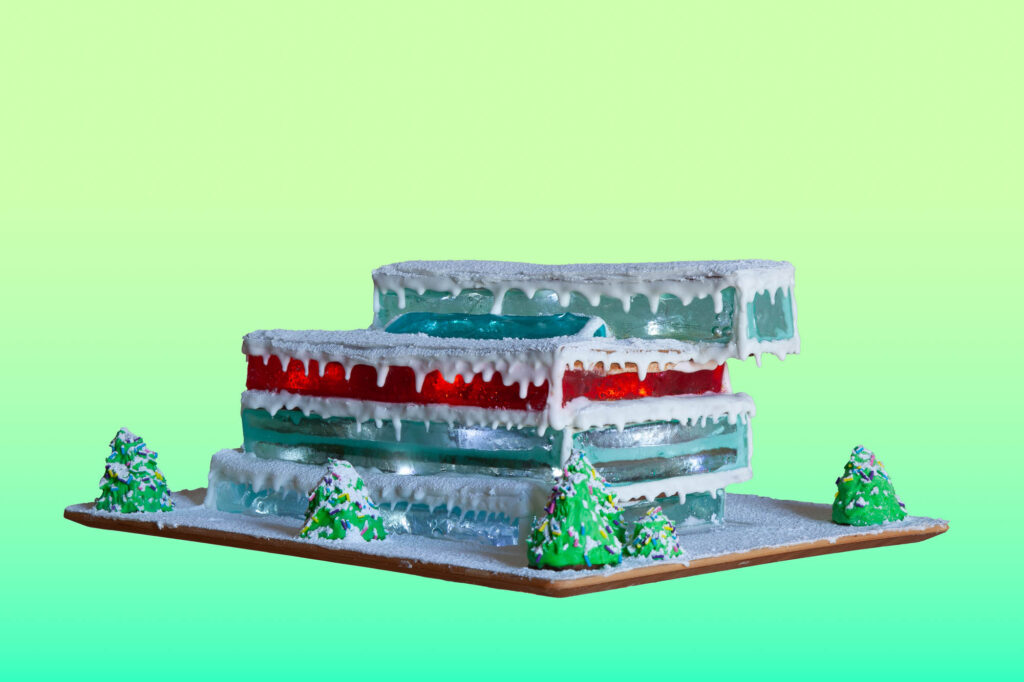
Gingerbread and isomalt glass architectural model of a contemporary library. It is a stack of four rectangular sections, with the third coloured red. The model is covered in icing made to look like snow and icicles, and surrounded by a few Christmas trees made of green icing and sprinkles.
“Halisnack Central Library”, my entry to the 2023 TSA Gingerbread City challenge, a model of the Halifax Central Library.

The best part of the TSA yearly competition is chatting with my fellow contestants (it’s not really a contest, there are no prizes), exchanging tips and techniques. This is what motivated me to resuscitate this blog to document my gingerbread engineering attempts so far, in the hope that they can be useful to others but mostly so that I can remember them myself.

Planning

Like all my projects, I like to start my gingerbread builds by doing some research, finding blueprints and good reference photos of all angles of my source buildings. Blueprints are helpful in getting the proportions right, but will likely need to be massively simplified in order for the model to translate well to gingerbread. From them, I can determine the target scale of my gingerbread model and calculate dimensions accordingly. An important factor to remember is that the gingerbread pieces will be pretty thick (5-8mm or so), this needs to be factored in to the calculations.

Overview of a cutting board with printouts of architectural models.

For more complex shapes, I’ve found that starting with a simple cardboard scale model helps designing the individual pieces of gingerbread that I will need to bake. Contrary to the images below where I used some discarded cereal boxes, I recommend using thicker corrugated cardboard instead, as it’s closer to the actual thickness of gingerbread or candy glass plus the frosting “glue”. For this project, using thin cardboard led me to underestimate wall thickness and I had to remake the roof pieces a second time.
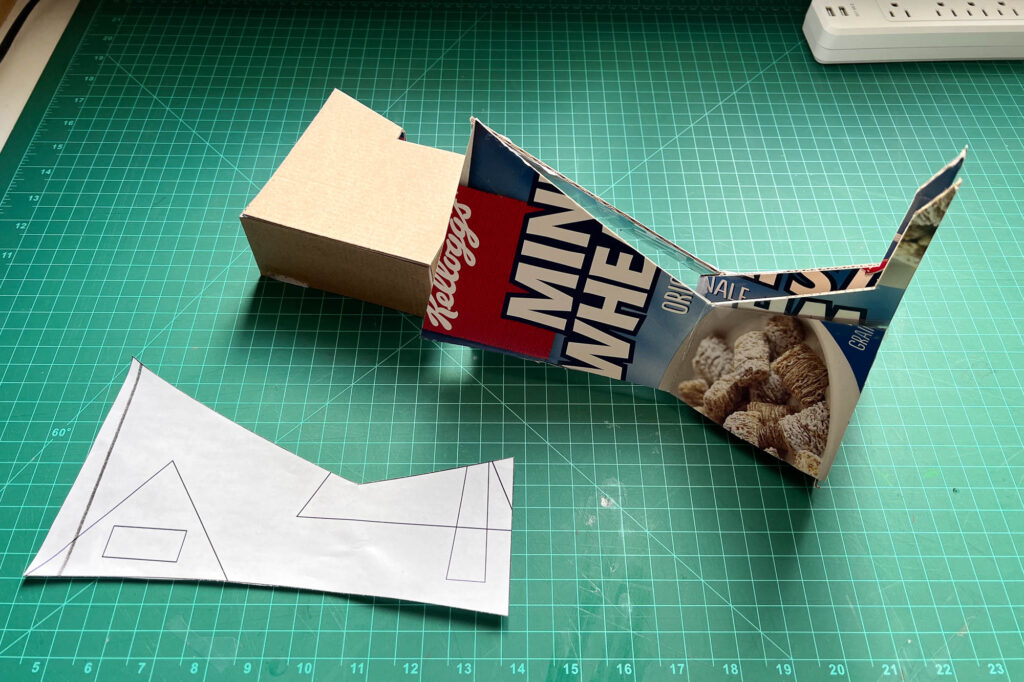
Cardboard model of a modernist church on a cutting mat.
This thin cardboard model of my first gingerbread library helped me get the final shapes of the pieces I needed, but I neglected to account for the dough’s thickness in how the roof met the supports. Using corrugated cardboard instead is closer to the final gingerbread build.

Complex shapes can then be either traced from the model pieces, or derived from the blueprints and then drawn or printed on paper to make guides for cutting gingerbread. Simpler, more geometric shapes can be directly measured on gingerbread without the need for guides.

Overview of a cutting mat with pieces of cardboard and a box cutter.
Cardboard model of a modernist church.

Depending on the complexity of the build, internal support pieces may be required, those should be planned for as well.

Something that I always forget at this stage is plan where my lights will go through. This is not a huge deal, as holes can always be drilled in the baked pieces later on for wiring, but I’d like to be more mindful of this in future builds.

Finally, I tend to err on the safe size and always bake a few extra “beams” that help me add support where needed during the construction phase.

Materials and techniques

When it comes to gingerbread architecture, I’m a bit of a purist and try to use mostly materials that I make from scratch. These include

  • Gingerbread (walls and internal structure)
  • Tuile (translucent walls – like those of the Beinecke library model)
  • Glass candy (windows)
  • Royal icing (glue and for piping objects such as trees)

Other materials that I’ve found useful:

  • Pretzel sticks and grissini (support beams)
  • Candy for decor (used parsimoniously)

Gingerbread

The recipe below results in what I like to call “structural gingerbread”. It’s not really tasty, especially when slightly overbaked, but it’s fairly sturdy. Also it uses shortening instead of butter since it will largely go uneaten and at Canadian dairy prices, I’d rather not waste any.

  • 1 1/2 cup shortening
  • 1 1/4 cup sugar
  • 2/3 cup fancy molasses
  • 3 eggs
  • 7 cups flour
  • 1TBsp cinnamon
  • 1 1/2 TBsp ginger powder
  • 1 1/2 tsp baking soda
  • 3/4 tsp salt
  1. Cream shortening and sugar in the stand mixer (paddle)
  2. Keep the mixer running at low speed, gradually add molasses and eggs
  3. Combine remaining dry ingredients in a bowl then add to batter gradually
  4. Place dough in saran wrap and refrigerate for a few hours
  5. Roll dough between sheets at 7mm. 4mm is feasible but will be less sturdy, use for decorative, non-structural pieces and cut to shape.
  6. Bake at 190°C for about 10 minutes, until brown – err on the side of overbaking

I use my trusty Betty Bossi “Teighölzli” to achieve consistent thickness for my dough, but you can use rulers or pieces of wood instead.

Gingerbread needs to be cut to shape before baking. This can easily be done using a knife, spatula or pizza wheel. I like using a small spatula, as its blunt end doesn’t damage my baking paper like a knife would. I revert to a knife for more delicate pieces. The pizza cutter is great for even straight lines.

A piece of gingerbread is being cut with a pizza wheel following a paper form.

For geometrical pieces, I don’t use tracing paper at all but instead measure out the dimensions and cut them using my dough spacers or a ruler as guide.

Before baking, texture can be added to the gingerbread by using silicon moulds or by scoring it lightly, for example to mimic concrete forms or texture concrete, paved surfaces, tiles, etc. However, all horizontal surfaces will likely disappear if I’m aiming for a “snow effect” layer of frosting, so I usually don’t bother texturing those.

Close up on a pair of hands cutting a window in a piece of gingerbread.
Cutting small details using a knife.

Curved pieces are trickier to achieve. It may be possible to quickly bend the warm dough as it comes out of the oven. My best results were achieved by baking my dough on cardboard forms (glued together with icing to prevent any glue fumes in the oven).
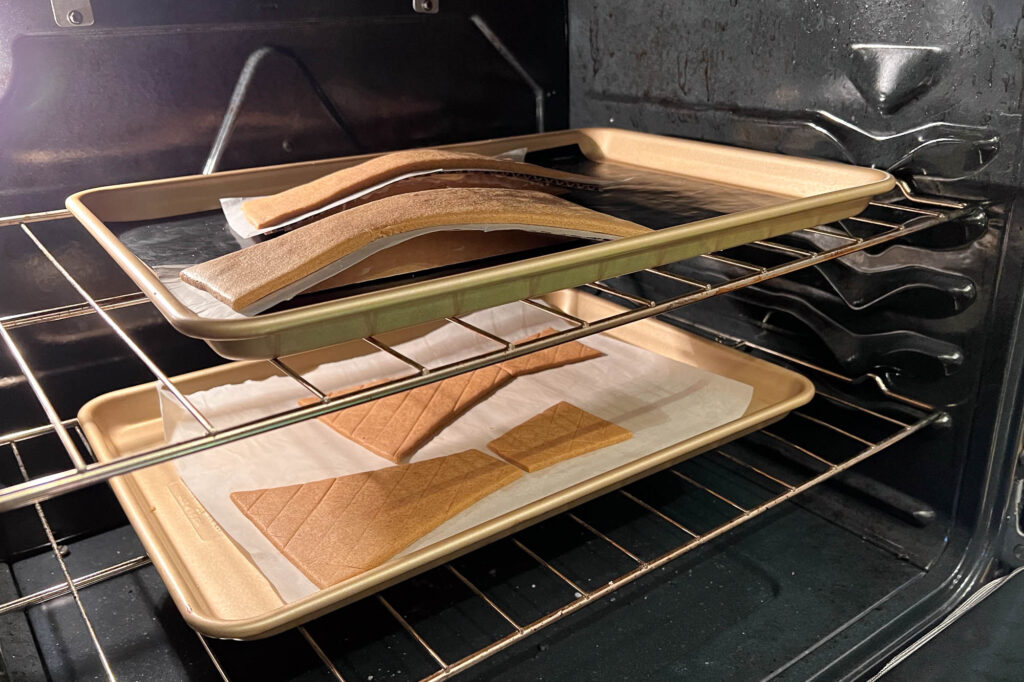
Interior of an oven with gingerbread pieces baking. On the lower rack are flat pieces, on the top rack are two pieces set on a curved cardboard form.
Baking curved pieces on cardboard forms got me the best results. The lower rack was a fallback in two pieces in case the curved ones didn’t work.

Despite my best efforts at baking all shapes to size, pieces tend to shift a little while baking. Missing material can easily be compensated by using a bit more icing at the joints, while extra material can be carefully “sanded” down using a microplane. Sandpaper can be used for fine corrections, but it tends to get clogged with gingerbread dust, so I don’t use it for bigger jobs.

A piece of gingerbread is being grated on a microplane.
Sanding down pieces of gingerbread to size with a microplane.

It’s always a good idea to plan spares for especially as accidents do happen. I usually bake an extra set of the more complex shaped pieces, in case one breaks. I then cut the leftover dough in a variety of rectangles and beams, to be used in case I need additional support during construction.

Tuile

I used tuile to recreate the translucent marble panels of the Beinecke library and was blown away by the results!

Contrary to the gingerbread above, these tuiles are pretty tasty. Which comes in handy as it’s a very brittle material and quite likely to break during construction. For this reason, it’s advised to bake some spares. Broken or leftover tuiles are delicious!

  • 2 egg whites
  • 125g icing sugar
  • 60g flour
  • 1tsp vanilla extract or other flavour (e.g. almond)
  • 60g butter, melted and cooled
  • Flaked almonds (optional)
  1. Whisk egg whites a little in a bowl and add sugar, whisk more until frothy (but not stiff peaks, we’re not making meringue)
  2. Stir in flour and vanilla extract, then add melted butter.
  3. Mix to a smooth batter. It should flow slowly down a spoon, kind of like pancake batter
  4. Spread batter through templates cut from acetate sheets (very thin) onto lined baking trays, then remove template
  5. Bake at 180°C for 7-8 minutes (until the edges turn golden) – do not overbake!
  6. Working quickly, remove the tuiles with an offset spatula and roll or form them if needed

(Recipe adapted from Tales from the Kitchen Shed)

Tuiles don’t keep for a very long time as they absorb moisture, but they can last one night on a cooling wire. The batter keeps for a few days in the fridge if needed.

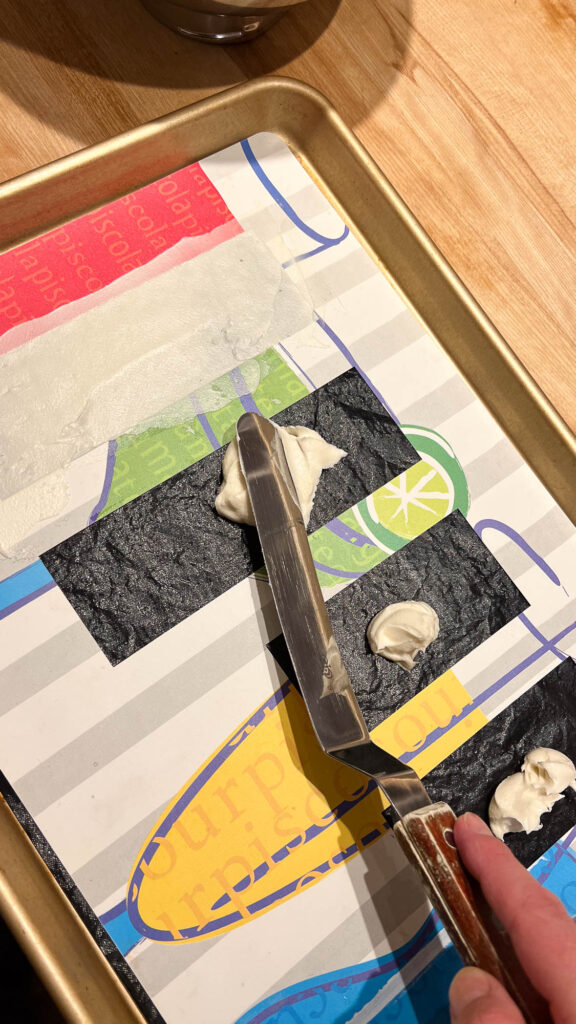
Forming tuiles is done by spreading the batter in a very thin layer using forms of acetate sheets cut to the desired shapes. Since I didn’t have acetate sheets on hand, I used a set of ugly old placemats, in which I cut the shapes of the panels I needed.

Tuile panels are very thin and fragile, so they can definitely not be used as freestanding walls. Instead, think of them as the curtain walls of gingerbread architecture: affixed with a little quantity of icing to a support structure of gingerbread slabs.

Tuile batter is being spread on plastic forms.

Edit: It later occurred to me that host cuttings sheets that for some reason are ubiquitous in Québec corner stores would also make a great translucent material.

Glass candy (or sugar glass) recipe

The following recipe (adapted from the nerdy mamma blog) makes perfectly serviceable sugar “glass” that can be used for gingerbread windows, without the use of exotic ingredients. The downside is that the sugar needs to be cooked to a certain temperature for it to work, during which it’s very hard to keep it from caramelizing a little. If this happens, the candy will not be perfectly clear but will take on a slight yellow colour. This year, I plan to try using isomalt instead, which does not require such high temperatures and should allow better colour control.

  • 2 cups granulated white sugar
  • 3/4 cups water
  • 2/3 cups light corn syrup
  • Food colouring (optional)

Warning! Boiling sugar is much hotter than boiling water, also it sticks. Be very careful not to spill or splash any of it on your skin.

Make sure your forms for pouring glass candy are ready before starting the recipe as you won’t have time once it’s ready to pour.

  1. Mix sugar, water and syrup in a small saucepan and heat gently, stirring to combine.
  2. Once the sugar is fully dissolved, increase the heat and bring to a boil, stirring constantly.
  3. Using a candy thermometer (ideally) or an instant read thermometer (not ideal but OK), cook until the mixture reaches 150°C (300°F) – known as the “hard crack stage”.
  4. Once the target temperature is reached, immediately remove from heat and pour into forms.
  5. Allow to cool for 2 hours (cover to avoid disturbing the glass).
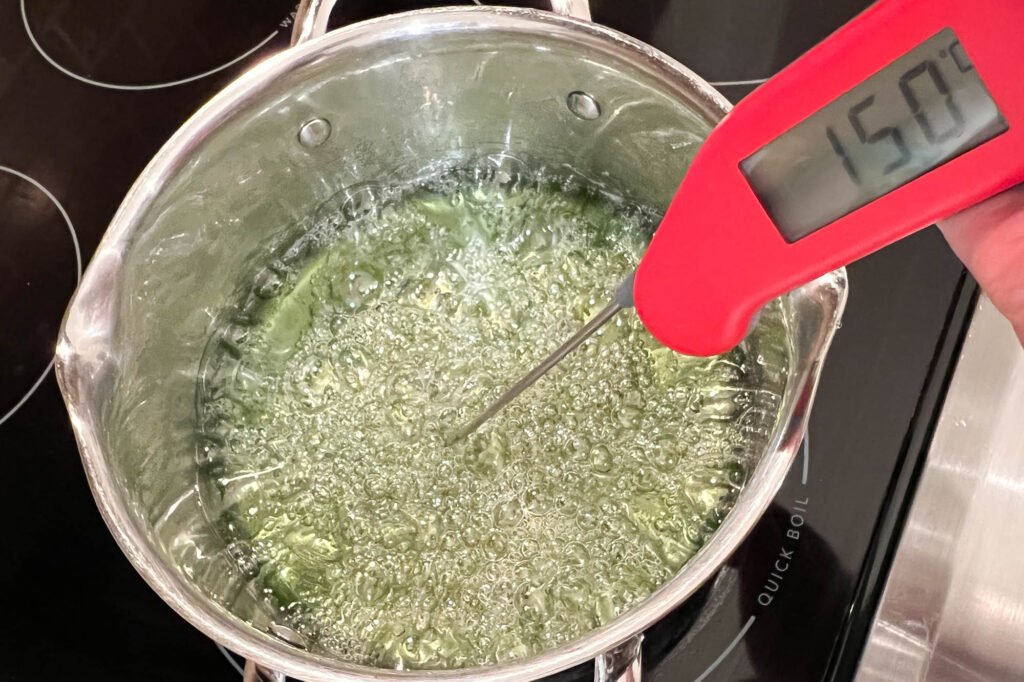
A stainless steel pot on a stove filled with a light yellow bubbling liquid. A instant-read thermometer plunged into the liquid shows a temperature of 150°C.
Once the mixture reaches 150°C, don’t stop and take a photo but instead remove it immediately, otherwise it will start to colour. Here, the blue colour I was aiming for turned to green when it started to caramelize.

Glass candy can be formed either by filling holes in previously baked pieces of gingerbread, or by pouring into moulds made of baking paper.
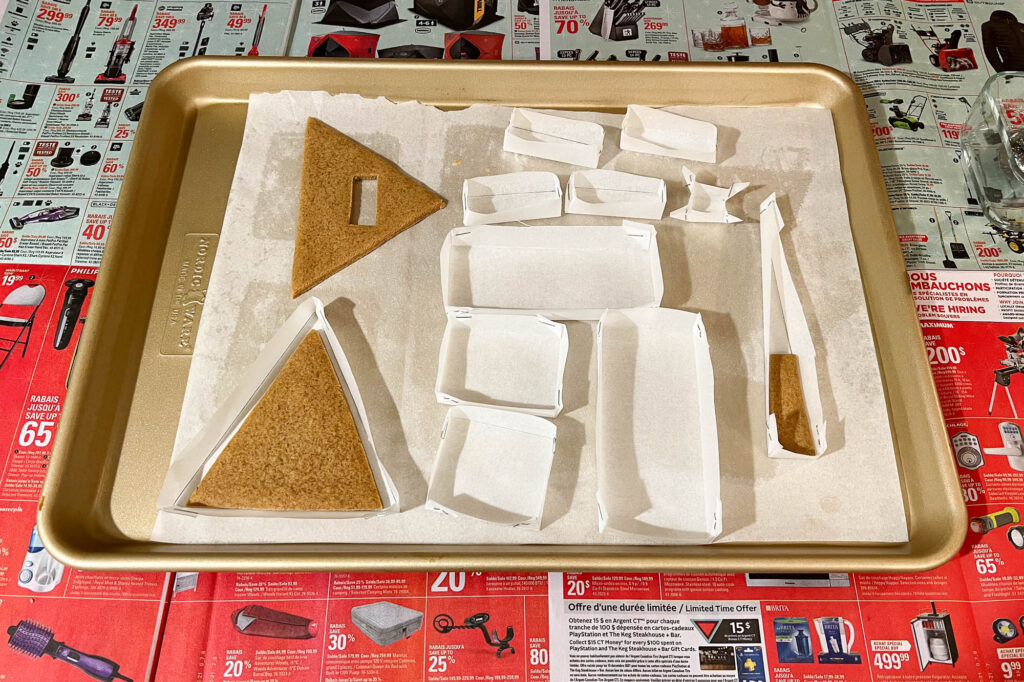
Baking tray with pieces of gingerbread and forms made out of baking paper.
Preparing paper moulds for glass candy. Some are freestanding pieces, other will be attached to pieces of gingerbread that had been baked previously.
Close up of a light yellow liquid poured in to forms made from baking paper and pieces of gingerbread.
Pouring glass candy into moulds.

The paper forms worked quite well. Bubbles can apparently be removed by quickly blowing a small torch on the surface of the glass before it sets, but I’ve never tried it.

The result is quite strong and can be used as structural elements. I used icing to bind them in place, but I think two pieces could also be stuck together by blowing the contact areas with a torch and affixing them together, a technique I plan to try in the future. Pieces can be carefully sanded down to size if needed, but be careful not to break them.

As said earlier, making glass candy from sugar is tricky as it can easily caramelize, resulting in a yellow colour. This year, I’m planning to use isomalt instead and will report back with my results.

Royal icing recipe

This is the “glue” that will stick the pieces together. It can also be used to pipe decorative elements, such as icicles, trees, candy canes, etc. if coloured.

I’ve found that royal icing, which includes egg white, tends to make sturdier and more solid “glue” than a simple sugar and water mixture. The latter can however be used in a pinch for small touch ups.

  • 3 egg whites
  • pinch of salt
  • 500g icing sugar
  1. Beat the egg whites to stiff peaks (the pinch of salt helps kickstart this process)
  2. Gradually add the icing sugar until the desired consistency is reached.
  3. Add a few drops of food colouring if required
  4. Transfer into piping bags

Fresh icing will gradually dry up, so minimize air exposure if you need to store it for more than 30 minutes. Either keep it in closed piping bags, or lay a sheet of saran wrap on top of your bowl of icing. Ideally you don’t want to keep icing standing for too long (it has raw egg in it). If baking in stages, I recommend making smaller batches for each stage.

Buttercream frosting

This simple frosting sticks well to all surfaces and can be applied in the desired thickness to mimic snow on roofs and the ground.

  • 1/2 cup shortening
  • 2 cups icing sugar
  • 2 TBsp milk
  1. Cream shortening in a stand mixer.
  2. Gradually add sugar.
  3. Finish with the milk and continue beating until the desired consistency is reached. Add more milk if too solid or more sugar if too liquid.

This can either be spread using a spatula or piped.

Construction techniques

When all the pieces are finished baking and the icing is ready, it’s time to start building the model! I like to use a piece of plywood as a base, but you can also use a tray, a serving plate or a piece of wrapped cardboard.

I like to light up my models by adding string LED lights, so I’m careful to drill a hole in my base to file them through, and be mindful of where I want there to be light when building the model.

Architectural model being built out of gingerbread and glass candy.
Starting to build my model, I glue structural pieces to the plywood base with a good amount of icing. Here, an extra piece of glass candy is used to reinforce the back wall.
A small piece of pretzel stick is being placed on a gingerbread model with tweezers.
Tweezers are very useful for inserting small pieces, like these bits of pretzel.
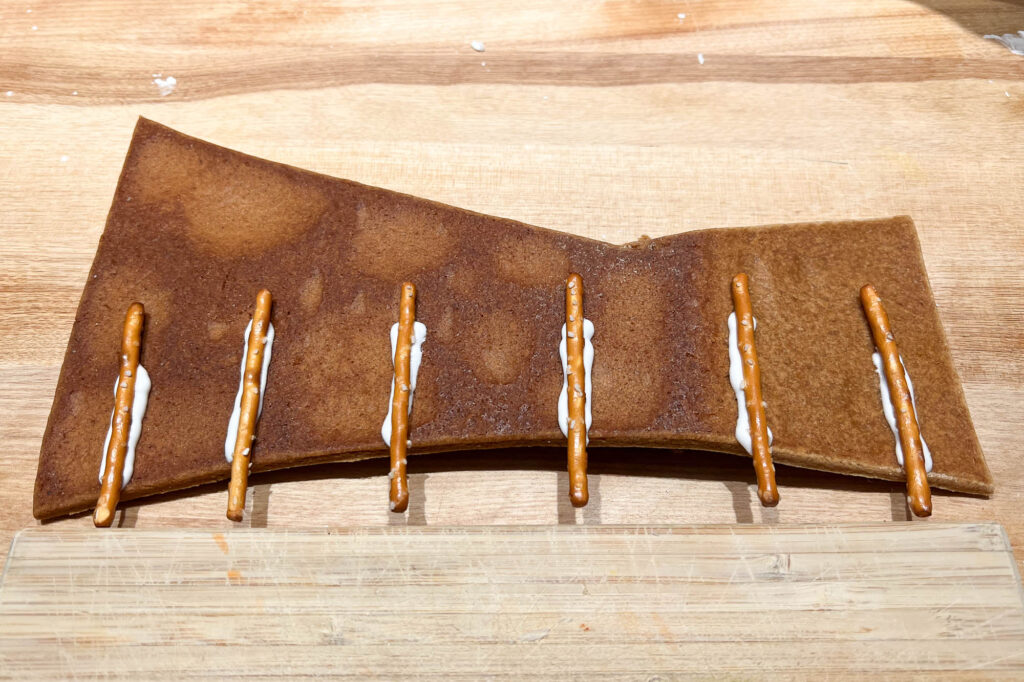
Pretzel sticks glued to a curved piece of gingerbread with royal icing.
Pretzel sticks make good beam material, though icing is not a very good lateral bond. Icing is enough to hold the sticks attached to the curved roof, but any force applied on them would break the icing.
A man uses a power drill to drill holes in a gingerbread model.
I regularly forget to plan for holes to wire my lights, nothing that a drill can’t fix.
A small piece of candy glass is placed on a gingerbread model with tweezers.
Assembling the elevator shaft out of candy glass.
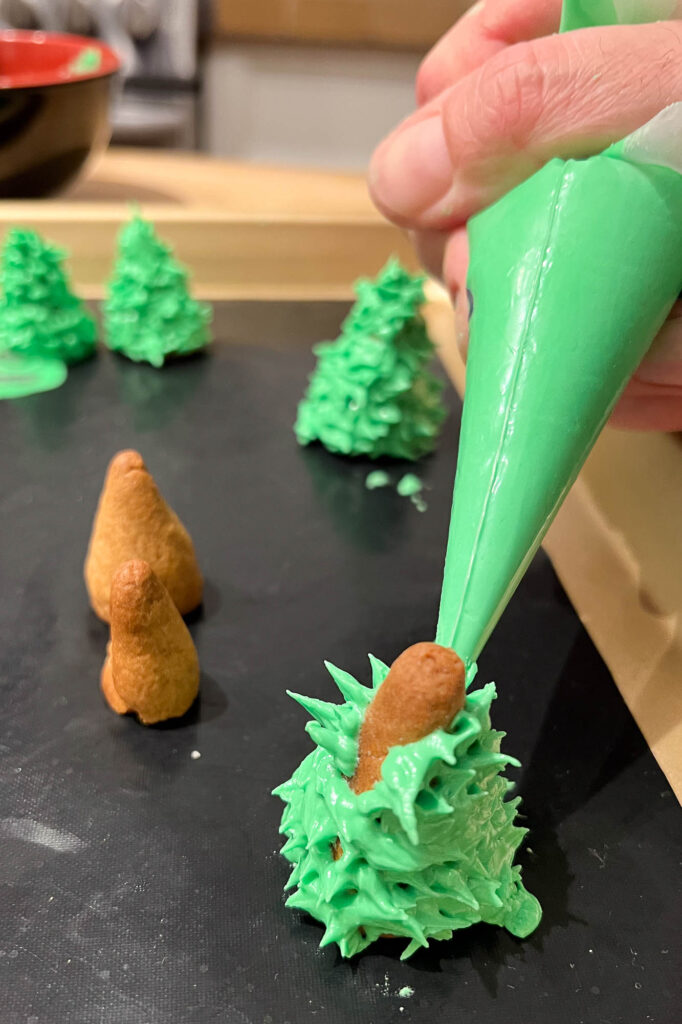
Green icing is being piped in the shape of fir trees.
Icing can also be used for decorative elements, such as these trees piped around a gingerbread core.
Gingerbread architectural model being put together. A combination of glasses and bowls is used to hold the pieces together.

For the sunken court of the Beinecke library, I first constructed a raised baseplate with a hole for the sunken court. This also created an empty space underneath the library where I planned to stash the battery box for the lights, but it ended up to be too small.

This gross simplification of the actual plaza was scaled to match the serving tray I used as a base, from which the other dimensions were all calculated. Keeping the plans on hand was useful to correctly position the library in relation to the court.

An assortment of glasses, bowls, chopstick rests and other cutlery was used to keep the pieces in place while the icing was setting.

Once the construction is complete, the last step is to add a layer of icing to mimic snow, and to finish decorating. I like a minimalist approach to my designs and thus don’t go overboard with the coloured candy decoration, but that’s just a matter of taste.

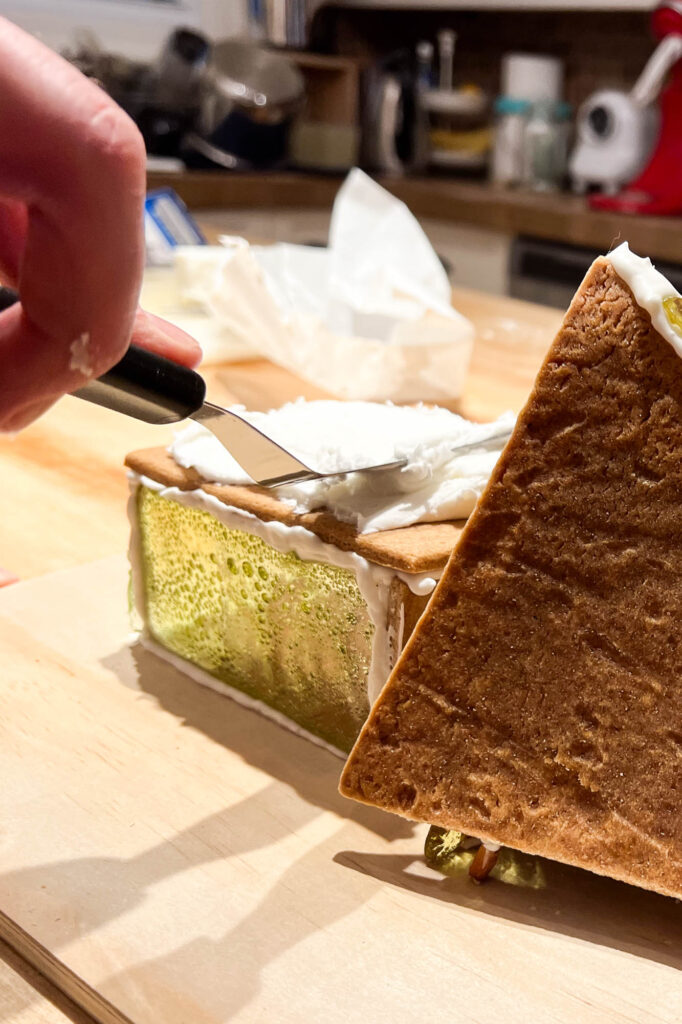
I’ve found that just adding powdered sugar ran through a sieve can work very well to add a layer of snow to horizontal surfaces. To get it to stick to the sloped roof of the Monique-Corriveau library, however, I first spread a layer of buttercream frosting before finishing off with a dusting of icing sugar.

Icing is being spread on a gingerbread model.
Adding buttercream frosting for snow effect.

Conclusion

Gingerbread and candy glass architectural model of a modernist church. The model is lit from the inside.

Here’s everything I’ve learned so far in the delicate art of gingerbread architecture. I hope to continue adding to this post as I keep experimenting.

For more inspiration, I recommend checking out Joël’s Instagram stories, as well as previous TSA Gingerbread City entries. There’s much to learn from such talented gingerbread architects!

Also, if you don’t already know about the Monique-Corriveau library, go have a look at it on my photo blog. It’s a converted 1964 church designed by Jean-Marie Roy, transformed into a library in 2013 by Dan Hanganu and Côté/Leahy/Cardas, and it’s my favourite library in Québec City!

If you found this useful and have used any of the tips here, I’d love to see the results! Please get in touch if you care to share them.


California Suitcase

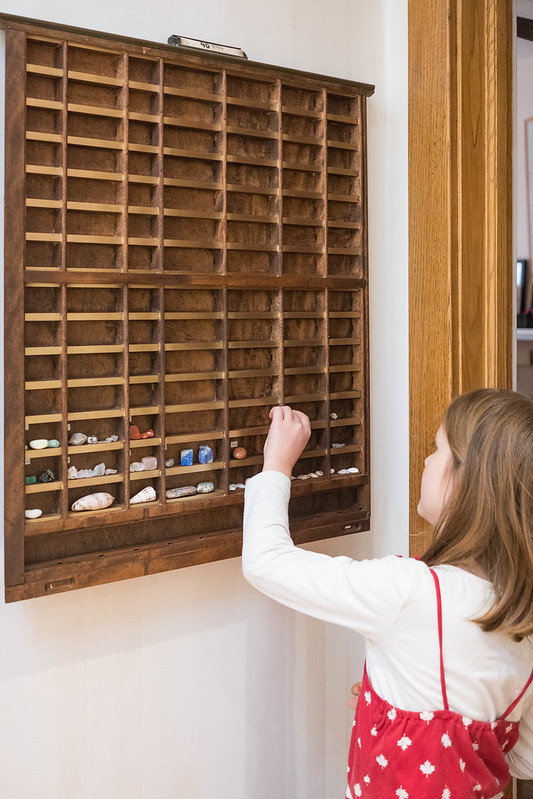
My daughter recently developed an interest in rocks and minerals, and through exploration, museum shop visits, mail orders and charming the staff of a minerals workshop into selling her a rare chunk of real labradorite from Labrador, her collection has quickly grown past the series of plastic boxes it started with.

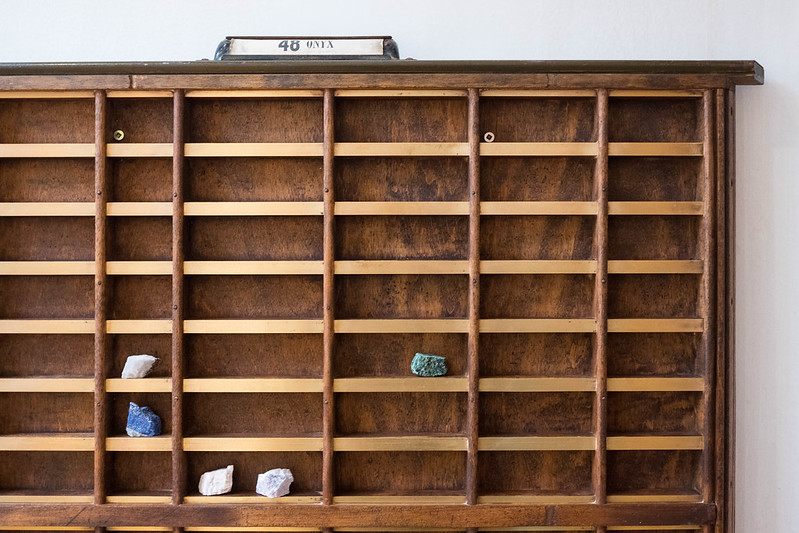
48 Onyx

I had been meaning to build her a display case, when I stumbled upon an antique movable type drawer at a reclaimed wood store last fall. As I was waiting for the bus with my recent acquisition in hand, a fellow rider asked me what I was going to do with the “California suitcase” I was carrying. As it turned out, he used to work for a Toronto printer, and this was how he had learned to call this particular piece of furniture.

Tinting

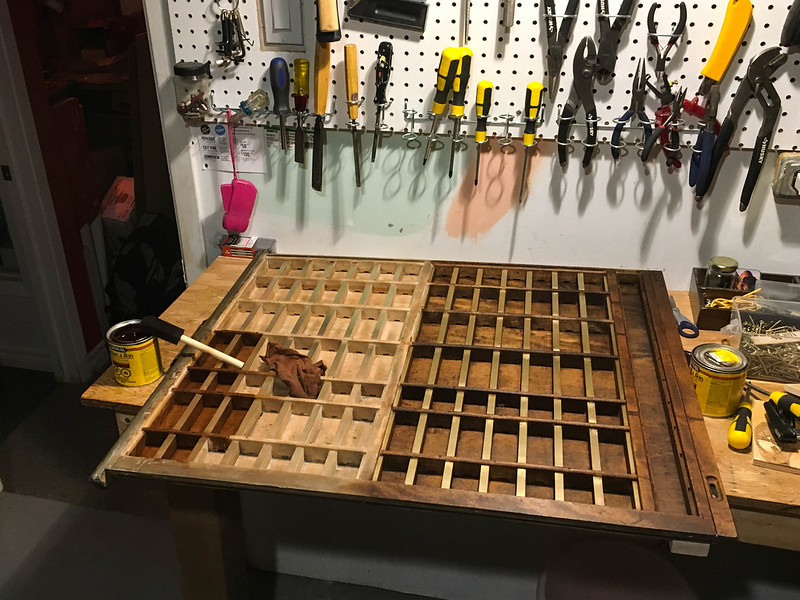
Over the coming weeks, we cleaned it up, brought the brass inlets to a shine using Bar Keeper’s Friend and a toothbrush, and then stained the wood to enhance the grain and increase the contrast with the brass.

Rocks on a shelfWe’re both very pleased with the result!

Sorting

Impressions from the Artist Project 2017

I like going to art fairs. Even though a future in which I can waltz through such an event with a chequebook and pick up original art for the walls of my perfectly decorated lodgings will probably remain a fiction, it is a fantasy that I like indulging in. And sometimes I do end up buying a print, and I never regretted it. Here are some of my favourite artists from this years Artist Project Toronto.

Duncan C. McLean – LOW-RES / HIGH-RISE

By reducing the resolution of his photographs of Toronto high-rises, McLean created a series of abstract images. The strict geometry of pixels meets that of the glass facades, while only slight variations in colour hint to the reflections of other buildings. Some look like Sim City blow-outs, others verge on the abstract. Simple, yet clever.

Low-resolution (pixellated) image of a high-rise building, at sunset.
LOW-RES / HIGH-RISE by Duncan McLean

Hugo Cantin – Mini-Cinema

While visually similar to McLean’s pixellated high-rises, Cantin’s film stock collages swap the digital for the analog. And it’s by zooming in, not out, that the abstract becomes real.

1955 Human Skeleton Classroom Documentary – 16mm Film Collage by Hugo Cantin

Emanuel Pavao – Tape Art

Pavao’s medium of choice also comes in rolls. His Toronto street scenes are entirely made of pieces of tape and often capture the grittier, stickier aspects of the city.

Toronto street scene depicting a truck covered in graffity, made with coloured tape.
Bold As Love – Tape Art by Emanuel Pavao

Marina Malvada

From the streets of Toronto to the realm of Canada’s singing astronaut Chris Hadfield, who reportedly owns some of Malvada’s otherworldly creations. Her acrylic planetary bodies straddle the borders between hyperrealism and the blurriness of imagination. Also, they would make a great cover for the next La Planète Bleue album.

Acrylic painting representing a blue planet in space, with a astronaut floating above it on the lower left corner.
On Top of the World 2014 24 x 36 Acrylic on Wood by Marina Malvada

Jordan Nahmias – The New (Old)

Back to photography, I enjoyed Nahmias’ moody series of shuttered motels and deserted desert towns.

Photograph of the sky and a mountaintop behind an old motel, with a vintage sign advertising
6 & 40 by Jordan Nahmias

Justin Blaynay – Figurative artwork

Full circle back to reducing artwork to its constitutive pixels.

A pattern of dots and ovals in grayscale display the face of a woman.
Sierra by Justin Blayney

Automating and sending speedtest.net data to web services

Recently I got frustrated by a series of broadband service failures. I realized they were difficult to diagnose both by me and my service provider (who, by the way, was very helpful) because it was difficult to determine when exactly they occurred and whether the issue was with the broadband connection or my wireless router. This weekend, inspired by this Make: Magazine feature, I hooked up a Raspberry Pi to my broadband router, set it up to periodically query speedtest.net (using speedtest-cli) and log the results.

I’m not a particular fan of IFTTT, which I find too linear and limiting (not to mention a certain arrogance towards third-party content providers) and thus I looked for alternative ways to post my speedtest results to an online place where I could obsessively check them whenever I’m out of the house. I liked this post describing how to use the same speedtest-cli with Loggly instead of IFTTT. But of course I wasn’t satisfied with hashing together a bunch of perl one-liners, so instead I found this script to manipulate speedtest-cli output, and modified it so it could log results to a CSV file, post them to IFTTT, Loggly or to any URL that would accept JSON, such as Zapier:

./speedtest-extras.sh [-d] [-c] [-h] [-i secret-key] [-l]
    -d: debugging-mode (reuses previously logged speedtest result instead of queriying speedtest - faster)
    -c: CSV mode
    -h: Print CSV header (only if used together with the -c flag)
    -i: IFTTT mode. Takes an IFTTT Maker Channel secret key as argument (required)
    -l: Loggly mode. Takes a Loggly Customer Token as argument (required)
    -j: JSON mode. Posts the result as a JSON document to any URL passed as argument (required)

My modified command-line interface to speedtest.net is available on GitHub, where I’ve also posted a few usage examples. Here, I will concentrate on how to use it to post to Zapier.

How to automatically send speedtest results to Zapier

First, take care of dependencies. My script makes use of speedtest-cli, which in turn is written in Python. Assuming you’ve got a working install of Python, you can use your favourite package manager to get hold of speedtest-cli:

$ pip install speedtest-cli

Then download my code, either as a ZIP archive or by using git:

$ git clone https://github.com/timtomch/speedtest-cli-extras.git

Once you have downloaded my repository, navigate to the bin folder1 that’s inside it:

$ cd speedtest-cli-extras
$ cd bin

Then you can try running my script in CSV mode to make sure everything is working properly:

$ ./speedtest-extras.sh -c
2016-03-29 02:33:38 UTC;2016-03-29 02:34:19 UTC;Start Communications;XXX.XXX.XX.XXX;SoftLayer Technologies, Inc. (Toronto, ON);8.53 km;17.794 ms;23.97 Mbit/s;1.95 Mbit/s;http://www.speedtest.net/result/XXXXXXXX.png

Depending on the speed of your Internet connection, it should take about a minute to run the test. If you see output similar to the above, things are working.

It is now time to setup Zapier to receive your data. If you haven’t got an account yet, go ahead and create one (the free plan should work just fine). Then click the bright red “Make a Zap” button to get started.

Using the search box, choose “Webhooks by Zapier” as your trigger, then select the “Catch Hook” option. Leave the next screen (options) empty and click Next until you reach a screen that should look like this:

Screenshot of the Zapier interface showing which URL to send JSON data to.
Setting up a Webhook on Zapier.

Zapier will issue a custom webhook URL to trigger your events. Copy that URL to the clipboard.

Now run

$ ./speedtest-extras.sh -j <PASTE YOUR ZAPIER URL HERE>

and wait again for the prompt to reappear. If nothing else shows up on your Terminal it’s a good sign. Go back to your browser and click the blue “OK, I did this” button. After a short while, Zapier should display a nice green message saying the test was successful. Go ahead and click on the “view your hook” link to check what data was sent to Zapier. You should see something like this:

Screenshot of the Zapier interface, showing data submitted via a JSON Webhook.
Testing the Zapier Webhook to ensure the JSON data was properly received.

Then you can decide what to do with that data. I chose to have each event add a new line to a Google Spreadsheet:

Screenshot of the Zapier interface, showing options to set up a Google Spreadsheets app.
Setting up Zapier to add rows to a Google Spreadsheet.

Go ahead and test your setup, then save your Zap once you are happy with the results. Don’t forget to turn on your Zap.

Now, every time you fire

$ ./speedtest-extras.sh -j <PASTE YOUR ZAPIER URL HERE>

Zapier will execute the operation you specified (add a row to a Google Spreadsheet in my example). Now, if you had to manually run the script to get a measurement, that would defeat the whole purpose, so the last step is to add a cron job so the script is run automatically:

$ crontab -e

This lets you edit your crontab. To run a speed test every hour, add the following line to it:

0 * * * * ./absolute/path/to/speedtest-extras.sh -j <YOUR ZAPIER URL>

Note that you need to specify the whole path to the speedtest-extras.sh script in your crontab for it to work.

Now watch the data slowly pile up, and start drafting that email to your broadband provider.

Next step: full Raspberry Pi tutorial?

A recent conversation with a friend facing the same issue made me think I could also write up a short tutorial on how to replicate my Raspberry Pi speed tester setup from scratch. Anything to avoid working on more useful things, like getting ahead on my MLIS research or freshening up my resume for this position I’m considering applying to…

  1. This directory structure is not entirely necessary but is a leftover from the original speedtest-cli-extras which I forked.

Link dump 2016/8: Open science, books on a ship, waves in the Alps, maker projects

Writing power tools

As I’m in the early stages of my final research project for my studies in Library Science, I’m looking at different ways to organise my thoughts and materials, and taking it as an opportunity to try some of the tools that are defining the current trend towards open and reproducible research. Things like version control can however quickly become complex and might scare away the bravest. It is certainly one of the most challenging topics I’ve had to teach during Software Carpentry workshops. And I’m far from understanding all of it. That’s why this Plain Person’s Guide to Plain Text Social Science looks to be a fantastic resource, laying out a complete workflow using open formats. As far as writing the actual paper, there is still no tool that will replace me. Although it might soon change, as a novel written by a computer almost won a literary price in Japan. The wind-up bird got creative.

Words in transit

I like it when a subway station is being refurbished and traces of the past are briefly brought to light again while walls are being resurfaced. This happened recently on the Paris Métro Trinité station. Together with a glimpse of swanky typefaces and yellowing memories, one learns in passing that this operation in French is called décarrossage.

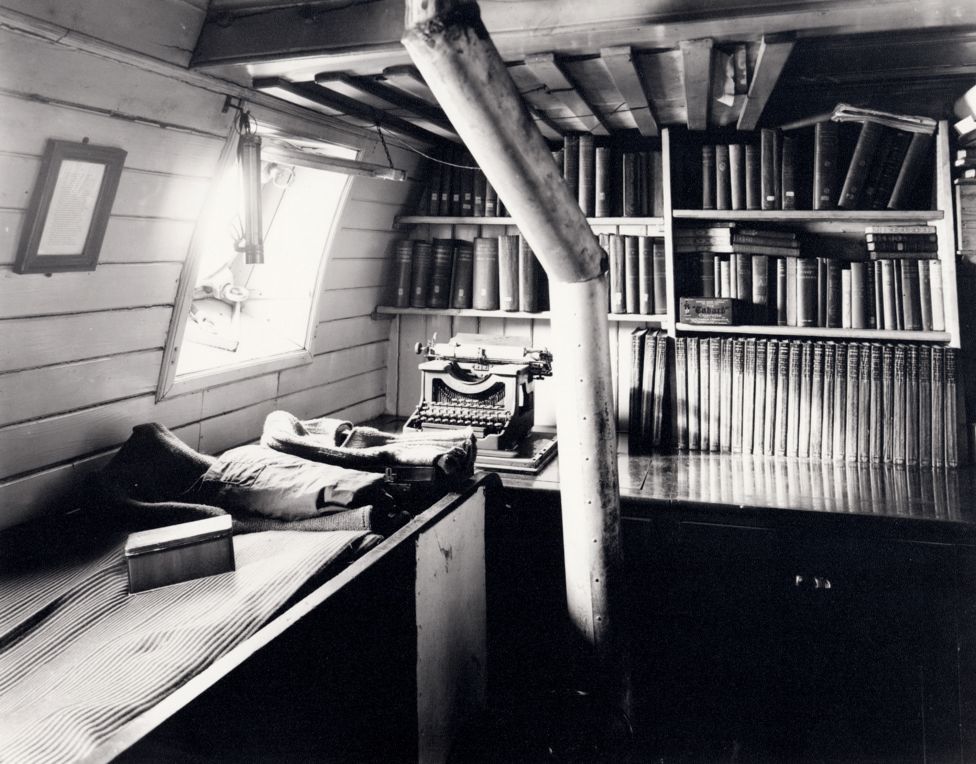
The Royal Geographical Society recently digitized a series of photographs documenting Shackleton’s voyage on the Endurance, including this view of his travelling library:

Black and white view of Shackleton's library on board the ship Endurance.
Sir Ernest Shackleton’s library on the Endurance. Source: bbc.com

Of course they couldn’t resist trying to identify the contents of the library. And it is only a matter of time before Shackleton’s collection is dutifully catalogued on LibraryThing.

Earlier this month, the same Royal Geographical Society was also hosting my friend and land-art artist Sylvain Meyer for the annual conference of the Society of Garden Designers. I’m very happy that Sylvain is getting recognized for his fantastic work! I also miss my print of his early piece Ondulation, which I loaned to another friend when I left Switzerland.

Photo of a land-art installation in the Swiss Alps. The earth has been manipulated to represent a set of concentric circles.
Ondulation by Sylvain Meyer

Making extravaganza

I’m currently clearing some backlog on my feed readers. Last week I went through the map folder, today it’s the one on making. A bunch of posts were about the insane Wintergatan musical marble machine that took the Internet by storm a couple of weeks ago. Here are some other projects that jumped at me:

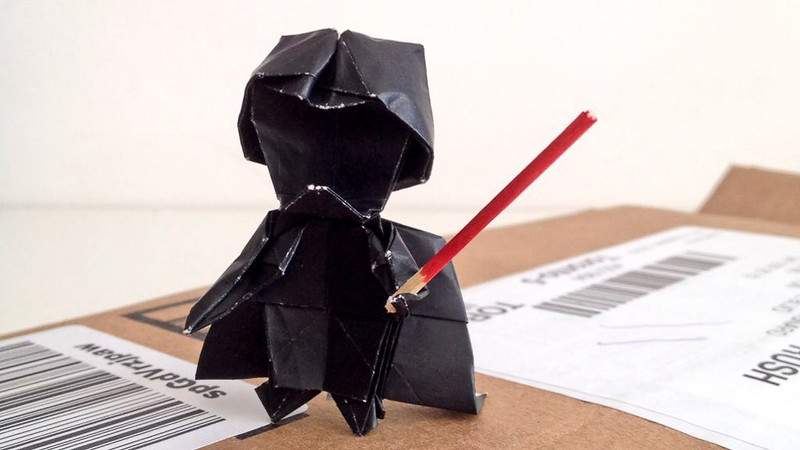
The other night I lost an hour of my life making an origami Darth Vader by following this instructional video by Tadashi Mori. Here’s an origami X-Wing fighter to go with it.

IMG_7247

Finally, I like a good project timelapse as much as the next guy, but this one is particularly entertaining.

Link dump 2016/7: Maps

I spent some time this week updating the Maps section of my feed reader, and I was glad to learn that Jonathan Crowe’s Map Room was back on the, ahem, map. Some posts I found interesting: Redrawing the London Tube Map, Mapping Swiss German Dialects1, the Ordnance Survey map of Mars, the 1936 Japanese Rail Network, a map of Paris’ pneumatic tube network and a mention of Around Switzerland in 80 Maps, from my friends at Helvetiq!

Ordnance Survey map of Mars
Ordnance Survey map of Mars [on Flickr]
Crowe also links to Why Children Still Need to Read (and Draw) Maps [PBS], which reminded me I still need to find a good atlas I can share with my daughter. I gave her a map of Ontario for a camping trip we did last summer so she could keep track of our journey. I agree that learning to use (and appreciate) maps is still an important life skill.

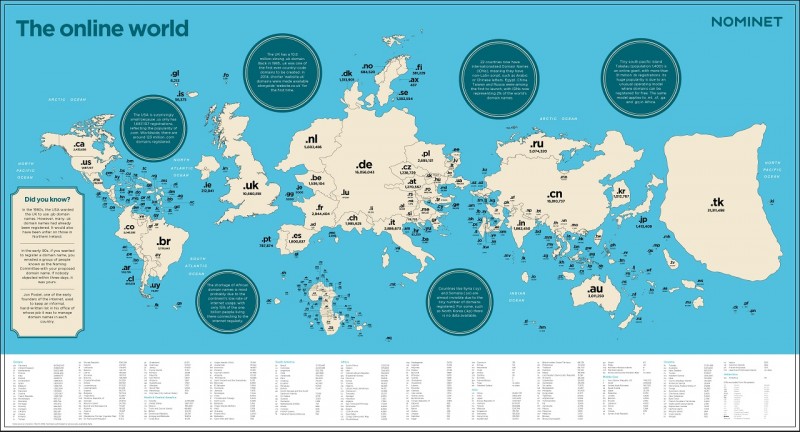
Further down in my inbox was this very interesting map of country TLDs, scaled by popularity, by way of the Strange Maps blog:

Map of the countries of the world, scaled according to the number of websites registered with their top level domains.
Map of the online world. Source: nominet.uk

Another good feed I subscribe to is Maps Mania, which unfortunately uses Feedburner to syndicate its content, with the result that only the briefest of snippets gets displayed in feed readers. This is not great for capturing the attention of the reader. I’m working on a way to use Huginn to create a nicer-looking feed, but I haven’t cracked the Feedburner nut yet. Anyways, here are a few posts that I found interesting: global flight connections map2, Rorschmaps and other Google Maps API hacks, mapping the word’s most boring (or interesting) roads by calculating how curvy they are, US Census name explorer and the UK surname map3.

All direct flight connections from Toronto's Pearson Airport.
All direct flight connections from Toronto’s Pearson Airport. Source: flightconnections.com

This heat map of public transit use in Toronto ties nicely with the everlasting debate on the city’s deficient transit infrastructure and the rampant cronyism that shapes it. It is encouraging to see some areas reach a healthy 50% of the population relying on public transit (which is not bad for a North American city). At the same time, one can’t help but see it as a map of income disparity, with well-connected wealthy neighbourhoods sticking to their cars, while many of those relying on public transit live nowhere near a mass transit line and probably don’t have much of a choice… Related: the Geography of Car Ownership in England and Wales and the visualization of rail station use in the UK.

Zipscribble maps aim to visualize how countries assign postal/zip codes. From the same source, the Travelling Presidential Candidate Map is a variant of the classic travelling salesman problem, computing the shortest path through all US ZIP codes.

Map of the USA showing the shortest line through all ZIP codes.
The Travelling Presidential Candidate Map. Source: eagereyes.org

Also one of my favourite visualizations from last year: the Isochrone maps of Europe by train. Also let’s not forget the Ultimate Crowdsourced Map of Punny Businesses in America.

Update: How could I have missed the awesome Super Mario style TTC map:

Map of the Toronto subway and RT system, drawn in the style of the Super Mario video game.
Toronto TTC Subway/RT map, Super Mario style. Source: davesgeekyideas.com/

Note that this map already includes the Spadina line’s extension, scheduled to open at the end of 2017. Isn’t it interesting to note that many such fan-fiction versions of the TTC map4 include future or imaginary lines? Cartographic wishful thinking…

Update 2: And here’s a map of the Toronto subway with the approximate walking time between stations5:

Map of the Toronto subway, with walking times between stations.
Approximate walking times between TTC stations. Creator: Pavlo Kalyta.

  1. this reminds me of the Chuchichästli-Orakel, which places visitors on a map of Switzerland based on how they pronounce 10 words, with uncanny precision.
  2. A good candidate for a possible post on travel planning tools, I think.
  3. Reminding me that I’m still looking for a data source for my idea of trying to map Switzerland’s patronyms by popularity…
  4. Listing my favourites here would be another idea for a post.
  5. Ditto

Migrating to a WordPress Network

I use this website to host a bunch of (mostly unrelated) services: wikis, my feed reader, and a couple of blogs for family members I like to keep separate. Those blogs used to each have their own WordPress install, which was not only a pain to keep up to date, but it also finally ate up all the SQL databases and subdomains I was allocated as part as my hosting plan. Setting up my wife’s new portfolio was an excellent excuse to find a better solution than to fire up yet another CMS instance. I decided to migrate the whole mess to a WordPress Network (previously called WordPress Multi-User). Which turned out to be much easier than I thought. Here’s how I did it and what I learned on the way.

1. Start fresh

I started with an (almost) fresh install of WordPress, the one that was powering this blog since November. Since I had used Softaculous to install it, I was able to setup automatic backups and updates while I was at it. I decided to move it to a subdirectory first to clean things up a bit on my home directory. According to the documentation, this would prevent me from creating subdomain sites (e.g. things like this.timtom.ch1 and that.timtom.ch) but I was able to find a way around this limitation by using the WP subdomain plugin, more on that later.

After moving WordPress to a new subdirectory, I checked that everything was still working on the main site. Since I already had a few posts live on that WordPress install, I backed everything up for good measure before I started the process.

2. Enable the Network feature

This is as easy as adding a single line to wp-config.php, and clicking through a few options on the admin interface. Since I was now running WordPress in its own directory, I knew running my Network under the subdomain model (this.timtom.ch) would not be straightforward, so chose to run it under the subdirectory model instead (timtom.ch/that).

Once my embryonic network was set up, I verified that the main site (this blog) was still working fine.

3. Import the other blogs into the new network

For each of the standalone WP instances I wanted to replace, I exported all content using the Tools > Export function.

Back in my Network admin interface, I then created a new site for each of them. I didn’t worry too much about naming the new sites, knowing I would fix their addresses later on. I chose unique names that I knew would not be conflicting with any pages I’d like to create on this blog in the future. I named them something like timtom.ch/sub-familynews etc.

Before importing the WXR files I had exported out of the old sites, I needed to install the WordPress Importer plugin. Despite being an official WP plugin, it unfortunately has a pretty bad reputation, and justifiably so, because of its poor interface and error management. It basically gives no feedback during the import process, which is unnerving and problematic if anything goes wrong. Fortunately, nothing bad happened to me. I imported each blog into the new sites I had just created, making sure to reallocate posts to the users that already had an account on my network, or to allow WordPress to create new accounts for those that didn’t. I chose to import all media, which is important since it will make a new local copy of all images and files that were referenced in the old blogs. Since I planned to delete the old blogs once the process was over, copying media was essential. I then armed myself with patience and a cup of herbal tea while the import plugin did its unnerving thing.

Once each import was done, I visited the new sites and made sure everything was in order.

4. Create subdomain redirects

I now had a suite of sites (e.g. timtom.ch/sub-familynews, timtom.ch/sub-projectx etc.) mirroring the old independent installs of WordPress that were all living in subdomains (e.g. familynews.timtom.ch). Since I wanted all URLs to continue working, I now had to map the old URL structure to the new sites.

I started by renaming each of the old blogs by 1. doing a full backup (or maybe I don’t, but if you’re following this, you should), 2. change their URL in Settings > General (the blog will instantly stop working, but not to worry) and then 3. rename the subdomain they’re operating in accordingly, e.g. in cpanel. I ended up having all my old blogs living at addresses such as projectx-old.timtom.ch. I will likely keep them around for a short while to make sure all is well with the new sites, before deleting them and free up some badly needed database space.

Then it was time for magic. I started by installing the WordPress MU Domain Mapping plugin, setting it up (a file with the slightly worrying name of sunrise.php notably has to be copied away from the plugin directory) and network-activating it.

I then went back to cpanel and created a new “alias” (also known as “parked domains”) for each of the subdomains I needed for my sites. Yes, even though they were all subdomains of timtom.ch (e.g. projectx.timtom.ch), I still needed to treat them as aliases for this to work:

Creating a new alias in cpanel
Creating a new alias in cpanel.

All the aliases I thus created point to the main timtom.ch directory. At first I thought I had to redirect them to the subdirectory in which my main WordPress install lives, but it turned out to be wrong. All subdomain aliases have to point to the home directory of your site for this to work.

As an aside, I found that I was able to make this work only by creating “aliases” using the procedure above. Merely adding a type “A” record in my host’s DNS using cpanel’s “Advanced Zone Editor” didn’t work, probably because the IP address my site uses is shared with other customers. The “alias” function probably makes the required extra settings so that any DNS entries point to the virtual server that’s allocated to me.

Back in WordPress, I then assigned the new subdomains to each of my new sites. The interface to do so is in My Sites > Network Admin > Settings > Domains. Unhelpfully, WordPress MU Domain Mapping’s interface asks for the “site ID” of each site to set this up, which isn’t that obvious to find out. One way I found to identify which ID corresponds to each site is to navigate to the Sites list panel of WordPress Network admin and hover over each site name. The ID will be visible in the URL for each site:

Screenshot of the WordPress Site admin, showing the mouse cursor hovering over a site URL to reveal its ID.
How to identify the site ID of a WordPress Network Site.

Once this is done, the last step was to set up each site’s main URL to the new subdomain, this is done in the Settings > General tab of each site.

Then for a short while none of the new sites worked, which was normal, as the new DNS information didn’t have time to propagate through the Internet yet. This can take up to one hour, depending on settings, so it was a good time to do something else, like starting to work on this blog post!

Once the DNS information was fully propagated, I verified that each of my sites was now working well, each in their own subdomain! I verified that the permalink structure was still the same that I was using for each of my old sites, so that the URLs to the posts and pages were still the same. Migration complete!

I am now the proud owner of a WordPress Network and I can create a new site in a few minutes. All I need once I created the site is go to cpanel, register a new subdomain using the “Alias” function and then assign it to the new site.

5. Fixing HTTPS

There was one extra step in my case since I’m using HTTPS encryption on this website (and you should too) and wanted it to work across all my subdomain WordPress sites too. The certificate I had for timtom.ch did not contain the subdomains I had just created, therefore my browser raised a security alarm when I tried to navigate to my new subdomains using HTTPS. Since I’m now using the Let’s Encrypt cpanel module to handle encryption, the only way to alter the certificate and include my new subdomains was to delete the old certificate and immediately create a new one. I then made sure to include all the new subdomains when creating the new certificate, and bingo, instant HTTPS across all my sites.

There were a few remaining caveats, however. Since the blogs I had just imported were not using HTTPS in the past, all the images I had embedded from Flickr were using HTTP in their <img> tags and thus raising mixed-content errors. I therefore had to go through all the posts that were affected and make sure all <img> tags were using HTTPS.

  1. N.B. all the URLs and directories mentioned here are examples and not actual URLs to anything on this site

Link dump 2016/5: Facebook colonialism, fake minimalism, SciHub and Foucault’s Pendulum

Migrate from Aperture to Lightroom

Edit (January 2019): It took me a long time to fully import my Aperture libraries to Lightroom! I started this process in February 2016 and migrated my last pictures in January 2019. A few things have since then changed, so I’ve updated this post accordingly.

A TL;DR version of this post is available below, summarizing the steps in my migration workflow.

The release of Aperture in 2005 aligned well with my increasing interest in photography at the time. Like many Apple products before, Aperture offered a unique combination of powerful features, ease of use, and good integration with other Apple products and workflows. After years of trying out various tools to (first) organize and (as I started researching photographic techniques) retouch my photos, Aperture was combining both in a unique way. I was convinced and soon bought a copy of the software. And again, like many Apple products before, a competitor soon released a very similar product. Adobe Lightroom came out in early 2007, and quickly become the market leader.

Even as I watched many of my photography friends progressively adopting over to Lightroom, correctly identifying the winning horse early on, I refused to see the writing on the wall and stuck to Aperture. My behaviour in that aspect is pretty acutely described in Alex Allen’s essay “Why we treat tech companies like religions” (mentioned on Spark #295):

And when you’re that tied in to an ecosystem, you have a motive to want to defend and validate the choice you’ve made

But of course all my photography friends were right to choose Lightroom, as demonstrated by Apple finally announcing they were pulling the plug in 2014. We are now in 2016 and I believe my period of mourning denial has lasted long enough. It is time for me to migrate to Lightroom. I spent some time thinking of the best way to do this and experimenting, and I’ve decided to document the process here in case someone finds it useful.

1. Upgrade to Aperture 3.6

Lightroom has a handy feature for importing Aperture libraries (Adobe being all to happy to welcome the Aperture castaways…). After briefly considering starting from scratch, I decided to use it to at least import all the metadata I had been carefully adding to my pictures (geolocation, tags, etc.). However the Lightroom import wizard warned me that my version of Aperture wasn’t the latest, and that it could cause some errors while importing, without however offering any details on what exactly would be impacted. I wasn’t able to find more information online about that either. In the end, I decided to upgrade to the latest version of Aperture, which wasn’t entirely straightforward with my setup. I have an older Mac Pro which I am loathe to run on the latest OS X version for performance issues. The last version of Aperture (3.6) does not run on anything prior to Yosemite, however. I ended up upgrading my Mac Book Air to El Capitan, install the latest Aperture on it and use it to upgrade my libraries. Convoluted, yes.

Edit (January 2019): I did eventually upgrade my Mac Pro to El Capitan and was able to finish my migration with fewer complications.

To make things even easier, I had bought the software (and any subsequent updates) as a physical DVD (2005, early adopter, remember?). But Apple at some point decided to distribute updates only through their App Store. Updates are only available to users who have previously bought the software on the App Store. Problem for me, since I had purchased a boxed version of the software. After scouring the forums for a solution that did not involve downloading a shady torrent file, I found mention of a user in the same situation who got Apple Support to add Aperture to their App Store purchases. I dutifully called the support line (my favourite activity in the universe). Let’s just say it wasn’t a short call. And it required me refusing to purchase Aperture again at some point (sic) and being a big enough pain that I finally got redirected to someone who understood the situation and provided me with a one-time code to “purchase” Aperture at no cost on the App Store. I was then able to upgrade to the latest version. Finally.

2. Split my library into manageable chunks

Now armed with the latest (and last) version of Aperture, I tried starting the Aperture import wizard in Lightroom, which asked me to locate an Aperture library and then started “verifying” it before offering me any further option. I waited several hours before eventually aborting the operation, since there was no sign how much longer this would take. It was evident my Aperture library was too large to be imported in one go, I would have to split it into smaller chunks. Doing it in batches also made me less nervous about missing a step and then having to start all over again, or messing everything up somehow.

I decided to do this by year. I first created a series of smart collections, filtering by date

Then I exported each as a separate library. I didn’t check the boxes to copy the originals or the previews into the exported library. I wanted to keep the originals in their current location. As for the previews, I knew I was going to have to rebuild them anyways (see next step).

The only drawback from this method is that Aperture doesn’t recreate the full collection structure when creating sub libraries this way:

Original Aperture library
New Aperture library after filtering by date
After import in Lightroom

I only realized this after importing a few year’s worth of images into Lightroom. This is annoying but not really a big problem, as I can always filter images by date or keyword and recreate most of these sub-collections in the future if I ever need to.

3. Preserving adjustments – kind of

Sadly, I knew that all nondestructive adjustments made to my photos in Aperture would be lost when importing into Lightroom. However, the Lightroom importer will try to import “high quality previews” if they exist. So to at least keep a flattened version of the photos I had edited in Aperture, I made sure to generate a fullsize preview of all edited photos. I started by making a smart library containing only images to which I had applied adjustments:

I then set the previews to full-size by selecting the largest possible size and quality setting in Preferences:

Finally I forced Aperture to recreate a full-size preview for all those images by selecting all images in my smart collection, and selecting Photos->Generate Previews while holding down the Option key (this will force generate them even if they are up to date). This increased the size of my Aperture libraries significantly (by a factor of 3), which was expected.

Edit (January 2019): I came back several months (OK years) later to finish the import process for my older images and my library wasn’t increasing in size during that step, which I found odd. I checked the location of the referenced files and sure enough, Aperture had lost track of the location of the originals. I fixed it by using File->Locate Referenced Files before reprocessing the previews.

I repeated this process for each of the yearly libraries I had created in the previous step.

When I first tried to import my new smaller Aperture libraries into Lightroom, I realized the importer was taking forever trying to validate the last opened Aperture library before letting me select which one I wanted to import. To stop wasting time on this step, I created a new empty Aperture library and set it as my current library before switching to Lightroom to start the import process.

4. Import into Lightroom

Edit (January 2019): It turns out that the Aperture importer plugin has a tendency to hang after importing 1000 images or so in recent versions of Lightroom Classic. The workaround is to install version 6.0 of Lightroom Classic (from 2015, then called Photoshop Lightroom CC) and use that version to run the importer. Older versions can be installed from the Adobe Creative Cloud app by clicking the little arrow next to the Install/Update buttons and choose Manage>Other versions:

I decided to import the photos into a blank Lightroom library, to limit interference with existing workflows. After creating a new library, I then ran the Import from Aperture plugin, selecting each of my smaller Aperture libraries in turn to import from, and setting the target path to be consistent with my new Lightroom workflow.

In the options panel, I made sure to check the first checkbox to import the full-size previews for adjusted images I had generated in the previous step. I also opted to leave the referenced files in their current location on my hard drive.

I then took a deep breath and clicked Import. I found the process to be reasonably quick, about 20-30 minutes for each year of photos. After each import, I checked that the images were all properly referenced, checked a few folders and keywords. At first I was alarmed that I was ending up with many more pictures in Lightroom than in the original Aperture libraries, before remembering that the additional images came from the generated previews.

5. Cleanup

Aside from the fact that the adjustments I had made in Aperture couldn’t be imported and would have to be replicated one by one if I ever needed to reprocess an image, I found the transition to be reasonably smooth. I only realized later in the process that using smart albums to split my Aperture library into smaller libraries lost some granularity in my collections structure, but that’s a relatively minor annoyance. Some metadata cleanup was necessary, notably I noticed that accented characters in keywords appear to have been improperly converted. I decided to fix those over time as needed.

The other cleanup operation that I had to do was that some images (notably scanned images, and some coming from older cameras and smartphones) were not appearing in the right order. It turns out, Lightroom relies on the “Capture date” field to order images in chronological order and that field wasn’t properly filled for those images. This can be easily fixed by filtering by date unknown and then adjusting the capture time to mirror the file creation date for those images.

Screenshot of the Lightroom Metadata Filter, displaying photos with unknown dates.
Screenshot of the Lightroom fix date setting.

In the end, I realized that what took me the most time (apart from convincing myself to move to Lighroom already) was figuring out each step of this workflow. Once I had them in place, it was a matter of replicating a series of operations and letting the importer do most of the work. Since it took me a bit of research to put this workflow together, I figured it might interest someone else, thus I documented it here. Hope it helps!

TL;DR – My Aperture to Lightroom migration workflow

  1. Be sure to run the importer in Lightroom version 6.0 (2015). The importer doesn’t work well in newer versions. You can install older versions of Adobe apps by clicking the little arrow next to the Install button in the Adobe Creative Cloud app.
  2. Make sure you have a recent backup of your Aperture library, just in case.
  3. Check if you have images in the Aperture trash. Either empty it before going further, or if you want to keep your trashed images, apply a tag to them, because Lightroom will import them and mix them up with the others. Note that you can’t add a keyword to images when they’re in the trash, so you might need to put them in a temporary collection, add your tag or mark them as “rejected”. Note that if you use smart albums to split your library, the trashed images will not be imported.
  4. Split your Aperture library into smaller ones (e.g. by date) by creating smart albums with the proper limiters and then exporting each album as an Aperture library.
  5. For each of the smaller Aperture libraries:
    1. Make a smart album with the “Adjustments… are applied” rule
    2. Go to Preferences, under Previews select Photo Preview: Don’t limit
    3. Select all images in your adjustment smart album, press the Option key and select Photos->Generate previews (this will force generate them even if they are up to date). This will increase the size of your library significantly. If it doesn’t, something is probably not quite right! Start by checking that Aperture can locate all original files (File->Locate Referenced Files) and fix if necessary before trying again.
  6. BEFORE starting the import process in Lightroom, make a new empty Aperture library and exit Aperture with this library active. This will reduce the time Lightroom will try to “check” Aperture’s library when launching the importer.
  7. Import each of your Aperture libraries by using Lightroom’s Import from Aperture plugin, making sure to set the target location for referenced files to be consistent with your current Lightroom workflow. Click the Options panel and select all checkboxes to extract the full size previews you created in step 5 and import them as separate files, and to keep the referenced files in their current location instead of duplicating them.
  8. Once everything has been imported, cleanup your metadata as required, checking for missing capture dates.